The pistol squat, a formidable single-leg squat, stands as a benchmark of strength, balance, and mobility for fitness enthusiasts and athletes alike. Performed by squatting down on one leg to full depth while the other leg is extended forward, this bodyweight exercise is the ultimate test of unilateral power and control. Anyone looking to correct muscular imbalances, build functional lower-body strength, and improve proprioception can and should work towards this movement. Because it requires no equipment, the pistol squat can be practiced anywhere, making it a versatile and powerful tool for building a resilient, capable body.
What is a Pistol Squat (and Why Should You Care)?
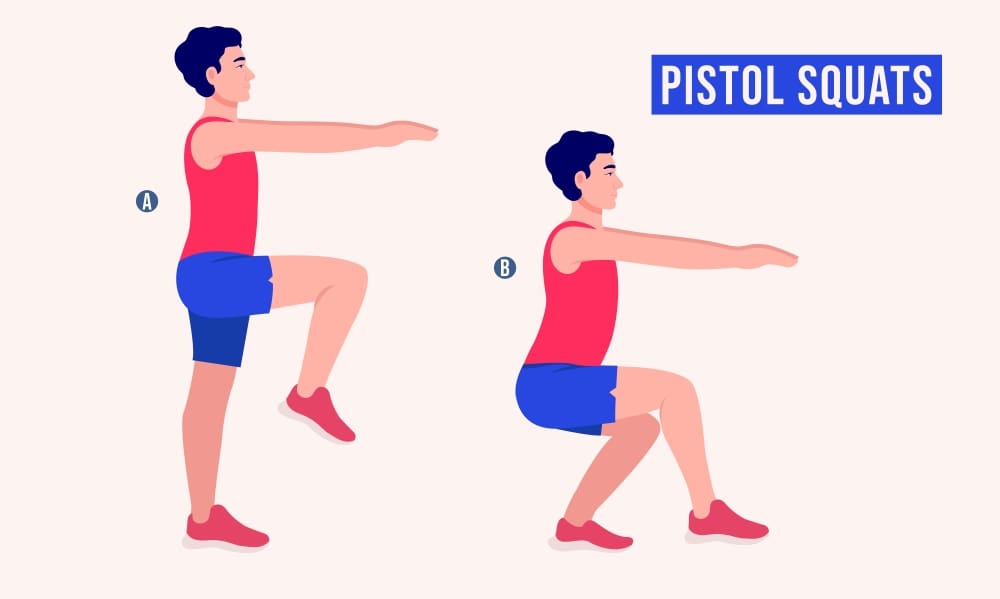
At its core, the pistol squat is a full-depth, single-leg squat. The name comes from the shape the body makes at the bottom of the movement, resembling the handle and barrel of a pistol. You begin by standing on one leg, extending the other straight out in front of you. You then lower your body in a controlled manner until the hamstring of your supporting leg is resting on your calf, before driving back up to the starting position.
The benefits of mastering this exercise extend far beyond simply looking impressive. It is a powerful diagnostic tool and a potent corrective exercise. By forcing each leg to work independently, it exposes and addresses strength discrepancies between your left and right sides, which are often masked during traditional two-legged squats.
Furthermore, the pistol squat demands incredible balance and body awareness, known as proprioception. Your nervous system must make constant, minute adjustments to keep you stable, enhancing your coordination. It also requires and builds exceptional mobility, particularly in the ankles, knees, and hips, which is crucial for overall athletic performance and injury prevention.
The Anatomy of a Perfect Pistol Squat
To perform the movement correctly and safely, it’s essential to understand its key phases. Breaking it down helps you focus on the specific skills needed for each part of the exercise.
The Descent (Eccentric Phase)
The movement begins with a hip hinge, pushing your hips back as if sitting in a chair. As you descend, your non-working leg extends forward, acting as a crucial counterbalance. Your goal is to maintain control throughout this lowering phase, fighting the urge to simply drop into the bottom position.
Keep your torso as upright as possible, though a slight forward lean is natural and necessary to maintain balance. Engage your core muscles to stabilize your spine and prevent your upper body from collapsing forward.
The Bottom Position
The goal is to reach a point of full compression where your hamstring makes contact with your calf. At this point, your supporting foot should be flat on the floor, with the heel firmly planted. This is the most common sticking point and is heavily dependent on ankle mobility.
Your non-working leg should remain elevated off the floor, parallel to the ground if your hamstring flexibility allows. You should feel stable, not precarious, in this deep squat position, ready to initiate the ascent.
The Ascent (Concentric Phase)
The upward drive is the most strength-intensive part of the movement. Push through your entire supporting foot—heel, big toe, and little toe—to create a stable base. The primary drivers are your quadriceps and glutes, which must fire powerfully to lift your bodyweight.
Maintain tension throughout your body as you rise, keeping your chest up and the non-working leg extended. Avoid using momentum to “bounce” out of the bottom, as this negates the strength-building benefits and can put undue stress on the knee joint.
Are You Ready? The Prerequisites for Pistol Squatting
Before you jump into specific pistol squat progressions, it’s wise to assess your foundational fitness. Lacking the necessary strength or mobility can lead to frustration and potential injury. A solid base makes the learning process smoother and safer.
Strength Assessment
First, you need a solid foundation of two-legged squatting strength. You should be able to comfortably perform at least 20-30 deep bodyweight squats with impeccable form, descending below parallel. Additionally, proficiency in lunges and split squats demonstrates that you have some capacity for unilateral work.
Mobility Assessment
Ankle mobility, specifically dorsiflexion, is arguably the most critical component. To test this, face a wall and place your foot a few inches away. Without letting your heel lift, try to touch your knee to the wall. If you can’t, your limited ankle mobility will likely cause your heel to lift during a pistol squat, making it nearly impossible to perform correctly.
Hip mobility is also key. You should be able to sit comfortably in a deep, two-legged “third-world” squat for at least 30 seconds. This demonstrates that your hips have the required range of motion to handle the bottom position of the pistol.
Balance Assessment
Your ability to stabilize on one leg is non-negotiable. Test yourself by standing on one leg with your eyes open. You should be able to hold this position for 30-60 seconds with minimal swaying before you even consider attempting a single-leg squat.
Your Step-by-Step Pistol Squat Progression Plan
Mastering the pistol squat is a journey of patience. Rather than repeatedly failing at the full movement, use this progressive approach to build the requisite skills systematically.
Step 1: Build Foundational Mobility
If you failed the mobility assessments, start here. Dedicate time in every workout to mobility drills. For ankles, perform wall stretches and calf stretches on a step. For hips, practice holding a deep squat (you can hold onto a pole for support) and incorporate exercises like the pigeon pose.
Step 2: Develop Unilateral Strength & Control
Begin by using assistance to complete the full range of motion. Holding onto a TRX, gymnastics rings, or a door frame allows you to use your arms to pull yourself up, reducing the load on your leg. Over time, rely less and less on your arms.
Alternatively, practice pistol squats to a box or bench. Start with a high box that allows you to squat with perfect form. As you get stronger, gradually use lower and lower boxes, increasing the range of motion until you are squatting to a very low surface.
Step 3: Master the Eccentric Phase
The eccentric, or lowering, portion of a lift is where you build significant strength and control. Perform “pistol negatives” by lowering yourself on one leg as slowly and smoothly as possible. Once you reach the bottom, place your other foot down and stand up using both legs. This isolates the most challenging part of the movement.
Step 4: Conquer the Bottom Position with a Counterbalance
Many people fall backward because their center of gravity is too far back. To fix this, hold a light weight (a 5-pound plate is perfect) straight out in front of you. This small counterbalance shifts your center of gravity forward, making it much easier to stay balanced and keep your heel on the ground. As you improve, use progressively lighter weights until you need none at all.
Step 5: Putting It All Together – The Full Pistol Squat
Once you feel confident with the previous steps, you are ready to attempt the full, unassisted pistol squat. Start by aiming for just one perfect rep on each side. Focus on quality over quantity. It’s better to do one flawless pistol squat than five sloppy ones.
Common Mistakes and How to Fix Them
Even with a solid progression, you may encounter some common form issues. Identifying them is the first step to fixing them.
Heel Lifting Off the Ground
This is almost always a sign of insufficient ankle dorsiflexion. The immediate fix is to continue your ankle mobility work. In the short term, you can place a small plate or book under your heel to provide a slight lift, allowing you to achieve depth while you work on your flexibility.
Falling Backwards
If you’re tipping over at the bottom, it’s a balance or core issue. Revisit the counterbalance progression to learn how to manage your center of gravity. Ensure you are actively engaging your core and leaning your torso forward just enough to stay centered over your foot.
Knee Caving Inward (Valgus Collapse)
A knee that dives inward during the squat is a red flag for weak hip abductors, particularly the gluteus medius. This puts dangerous stress on the knee ligaments. To fix this, consciously focus on tracking your knee over your foot. Supplement your training with exercises like clamshells, side-lying leg raises, and banded lateral walks to strengthen the muscles responsible for hip stability.
Conclusion: The Journey to Mastery
The pistol squat is more than just an exercise; it’s a skill that demonstrates a high level of physical mastery. Achieving it requires a dedicated and intelligent approach that respects the interplay between strength, mobility, and balance. By following a patient, step-by-step progression and diligently working to correct your weaknesses, this once-impossible movement can become an achievable reality.
Remember that this is a journey, not a race. Listen to your body, prioritize perfect form over repetitions, and celebrate the small victories along the way. Mastering the pistol squat is a testament to your commitment to building a truly functional, resilient, and capable body for life.


