
A Quick Takeaway
The Story Behind the Trend
How to Make It Work for You
The Community View
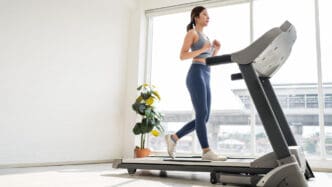
Ensuring your treadmill provides an accurate reflection of your running pace is paramount for effective training, especially when aiming to run faster in challenging climates like Miami, Florida. Treadmill calibration is the essential process of verifying and adjusting your machine’s speed settings to match the actual belt speed, allowing you to trust the data displayed and precisely track your progress, optimize workouts, and achieve your performance goals whether you’re logging miles indoors to escape the heat or preparing for a race.
Why Treadmill Calibration Matters for Your Performance
Many runners unknowingly train on treadmills that display inaccurate speed and distance readings. This discrepancy can significantly undermine your training efforts, leading to frustration and stalled progress. An uncalibrated treadmill might make an easy run feel harder than it should, or a speed workout less effective because you are not truly hitting your target paces.
For athletes focused on improving speed, precision is non-negotiable. Interval training, tempo runs, and race pace simulations all rely on accurate speed measurement. If your treadmill is off by even a small percentage, your perceived effort won’t align with the actual work being done, making it difficult to gauge fitness improvements or prepare effectively for outdoor races where every second counts.
Factors Affecting Treadmill Accuracy
Several elements can contribute to a treadmill’s speed inaccuracy over time. Regular wear and tear on the motor, belt, and rollers can lead to inconsistencies. Belt tension, which can loosen or tighten with use, also plays a crucial role in how smoothly and accurately the belt moves at a given setting. Similarly, the speed sensors, which monitor belt revolutions, can drift or become less precise.
Environmental factors, though less direct, can also subtly influence performance; for example, extreme humidity in places like Miami can affect electronics over many years. However, the primary culprits are mechanical and electrical components within the machine itself, making routine checks and adjustments vital for maintaining optimal functionality.
When to Calibrate Your Treadmill
Calibration isn’t a one-time fix; it’s a periodic maintenance task. You should consider calibrating your treadmill when it’s brand new to establish a baseline, or after any major maintenance or repairs. If you notice your indoor pace feels significantly different from your outdoor pace at a similar effort level, or if your run data (distance, speed) seems inconsistent, it’s a strong indicator that calibration is needed.
A good rule of thumb is to perform a calibration check every six months to a year, especially if the treadmill is used frequently. This proactive approach helps catch minor inaccuracies before they become significant issues that derail your training.
Methods of Treadmill Calibration
There are several ways to check and, in some cases, adjust your treadmill’s accuracy. These methods range from simple DIY techniques to using external devices or calling in professional help.
The “Mark and Measure” Method (Manual/DIY)
This is the most common and accessible method for home users. It involves manually measuring the distance the belt travels over a set period at a specific speed setting. While it doesn’t always allow for direct adjustment of the treadmill’s internal settings, it provides a crucial offset value, letting you know exactly how much faster or slower the treadmill is compared to its display.
Using a Foot Pod or GPS Watch
Modern running gadgets like foot pods or GPS watches with indoor running modes can also be used to gauge treadmill accuracy. A foot pod, often clipped to your shoe, measures stride length and cadence to estimate speed and distance. Many GPS watches now have internal accelerometers that can do the same. While these devices can provide a good comparison, they also need to be calibrated themselves (usually by running outdoors with GPS) to be truly accurate indoors. They serve as a good secondary check rather than a primary calibration tool.
Professional Service
For significant discrepancies or if your treadmill offers advanced calibration options not accessible to the user, calling a certified technician is the best approach. Professionals have specialized tools to accurately measure and often recalibrate the internal settings of the machine, ensuring the most precise adjustments.
Step-by-Step Guide: The “Mark and Measure” Method
This DIY method empowers you to understand your treadmill’s true speed, allowing for more informed and effective training.
Preparation
First, gather your tools: a tape measure, a piece of brightly colored tape or a marker, and a stopwatch or a watch with a second hand. Ensure the treadmill is clean and clear of any obstructions. It’s also wise to perform this test when the treadmill is “cold,” meaning it hasn’t been used recently, to avoid any heat-related variations in belt friction.
Measuring the Belt
With the treadmill off, place a piece of tape or make a mark on the treadmill belt. Then, carefully measure the circumference of the belt. This can be done by running the tape measure along the belt’s entire length, or by making a second mark on the frame and rotating the belt until the first mark returns to the second mark, then measuring the distance between the two marks on the frame. Most treadmill belts are approximately 100 inches (2.54 meters) in circumference, but it’s important to measure your specific machine for accuracy.
Setting the Speed
Turn on the treadmill and set it to a moderate, steady speed, such as 3.0 mph (miles per hour) or 5.0 km/h (kilometers per hour). Avoid very low or very high speeds, as these might introduce more variability. Let the treadmill run at this speed for a minute or two to ensure it stabilizes.
Counting Revolutions
Once the speed is stable, use your stopwatch to time a period of one minute (or 30 seconds for a quicker test, then double the result). As the belt moves, count how many complete revolutions your marked spot on the belt makes. For instance, if your mark passes the same point on the frame 10 times in one minute, that’s 10 revolutions.
Calculation
Now, it’s time for the math. Multiply the number of belt revolutions by the circumference of the belt. This will give you the total distance the belt actually traveled during your timed interval. For example, if your belt is 100 inches long and it made 10 revolutions in one minute, the belt traveled 1000 inches (100 inches/revolution * 10 revolutions).
To convert this to miles per hour, divide the total inches by 12 (to get feet), then by 5280 (to get miles), and then multiply by 60 (to get miles per hour). So, (1000 inches / 12 inches/foot / 5280 feet/mile) * 60 minutes/hour = actual speed in mph. Compare this actual speed to the speed displayed on your treadmill’s console. The difference is your treadmill’s calibration error.
Adjustment or Understanding the Offset
Most home treadmills do not allow for direct user adjustment of the speed calibration. However, knowing the discrepancy is incredibly powerful. If your treadmill reads 6.0 mph but is actually running at 5.8 mph, you now know to set it to 6.2 mph to achieve your desired 6.0 mph pace. This understanding allows you to train with confidence, knowing the true intensity of your workout.
Running Faster in Florida: The Role of Calibrated Treadmills
For runners in hot, humid climates like Miami, Florida, accurate treadmill calibration takes on added significance. Outdoor running in high heat and humidity can significantly slow your pace and increase perceived effort. This often drives runners indoors to maintain consistent training, especially for speed work or long runs.
An accurately calibrated treadmill allows you to maintain precise training zones and hit specific paces for interval training or tempo runs without the physiological stress of the outdoor environment. You can simulate race paces with confidence, knowing that the speed displayed is the speed you are truly running, enabling you to build speed and endurance more effectively. This precision ensures that when you eventually compete in cooler conditions or simply want to track your progress, your indoor efforts translate directly to your performance goals.
Maintaining Treadmill Accuracy
Beyond calibration checks, regular maintenance helps preserve your treadmill’s accuracy. Keep the belt and deck clean to prevent debris from interfering with belt movement. Lubricate the belt according to the manufacturer’s instructions to reduce friction. Periodically check belt tension; a belt that is too loose can slip, while one that is too tight can strain the motor and rollers, both affecting speed consistency. A well-maintained treadmill is a reliable training partner, essential for any runner looking to optimize their performance.